HA-TOY01
Hearit.AI BuddyBear

Device Information
- Product Model: HA-TOY01
- Product Name: ChatGPT AI Plush Toy (BuddyBear)
- Device Guide: TOY01 User Guide
Firmware Update Methods
We regularly release new firmware to optimize performance and add new features for your BuddyBear. You can update your device using the OTA (Over-The-Air) update method.
Method 1:OTA (Over-The-Air) Firmware Update
BuddyBear supports Over-The-Air firmware updates to add new features and improvements.
Prerequisites
- Device must be powered on
- Device must be connected to WiFi (2.4GHz network)
- WiFi network must have internet access
- Sufficient battery charge (recommended >30%)
Update Procedure
Step 1: Enter Configuration Mode
- Press the Power button (right foot) three times quickly
- Wait for the voice prompt: "Wi-Fi configuration"
- Device enters configuration mode
- LED indicator shows 🔵 blue light (steady)
- Device creates its own WiFi hotspot
Step 2: Connect to Device
- On your smartphone or computer, go to WiFi settings
- Find and connect to the WiFi network named "HA-TOY-XXXX"
- Your browser should automatically open the setup page
- If the page doesn't open automatically, manually enter
http://192.168.4.1/in your browser

Step 3: Access OTA Update
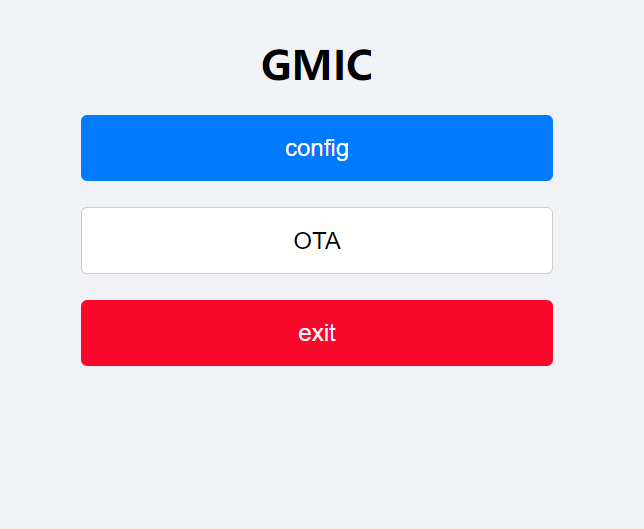
- On the configuration page, click the "OTA" button
- You will be directed to the firmware update page
Step 4: Enter Firmware URL
- In the firmware URL field, enter the update URL:
http://hearit.ai/d/HA-TOY/HA-TOY01-[date]-[version].bin
Example Firmware URL:
http://hearit.ai/d/HA-TOY/HA-TOY01-20250214-g219ff31.bin
- Click the "Update" button to start the update process
Step 5: Wait for Update Completion
- The device will download the firmware from the provided URL
- Update process begins automatically
- ⚠️ Important: Do not power off or disconnect the device during the update
- The update typically takes 2-5 minutes depending on internet speed
Step 6: Update Confirmation
Successful Update
- You will hear the voice prompt: "Update successful"
- The device will automatically restart
- After restart, BuddyBear is ready to use with the new firmware
Failed Update
- You will hear the voice prompt: "Update failed"
- The device will continue to operate normally with the previous firmware version
- You can retry the update process
LED Status During Update
| LED Status | Meaning |
|---|---|
| 🔵 Blue solid | Configuration mode active |
| Blinking during update | Firmware download and installation in progress |
| Returns to normal | Update complete, device restarting |
Troubleshooting
If the firmware update fails, try the following steps:
Common Issues and Solutions
Issue 1: Cannot connect to "HA-TOY-XXXX" network
- Solution:
- Ensure the device is in configuration mode (press Power button 3 times)
- Wait for the "Wi-Fi configuration" voice prompt
- Check that your phone/computer WiFi is enabled
- Move closer to the device
Issue 2: Update fails repeatedly
- Solution:
- Check your WiFi internet connection is stable
- Verify the firmware URL is correct (copy and paste to avoid typos)
- Ensure device has sufficient battery charge (>30%)
- Retry the update process from Step 1
Issue 3: Cannot access http://192.168.4.1/
- Solution:
- Confirm you are connected to "HA-TOY-XXXX" network
- Try using a different browser
- Manually type the address in the browser address bar
- Restart your phone/computer and try again
Issue 4: Update process stuck
- Solution:
- Wait at least 5 minutes (some updates take time)
- If still stuck after 10 minutes, power off the device
- Power on and retry the update process
- Contact support if problem persists
Method 2: Product Flashing (Windows)
This method is suitable for advanced users or when the online update is not available.
Preparations Before Starting
Required Items:
- A computer running the Windows operating system (supports Windows 7/8/10/11)
- Original USB data cable
- Device to be flashed
- Flashing program corresponding to the device (
.exefile)- 📥 TOY01-Firmware-Update.exe
Notes:
- Ensure the computer has sufficient battery power to avoid power failure during operation
- Use the original USB data cable to ensure connection stability
- Disable antivirus software and firewalls on the computer before flashing to prevent interference with program operation
- Do not disconnect the USB connection or close the flashing program during the flashing process
Flashing Steps
Step 1: Enter Update Mode
- Press the top button 5 times quickly, then hold
- The LED will turn off to confirm entry into USB update mode
- Connect the HA-PEN01 to your computer via USB cable
Step 2: Launch the Flashing Program
- Locate the flashing
.exefile corresponding to the device - Double-click the file to launch the flashing program
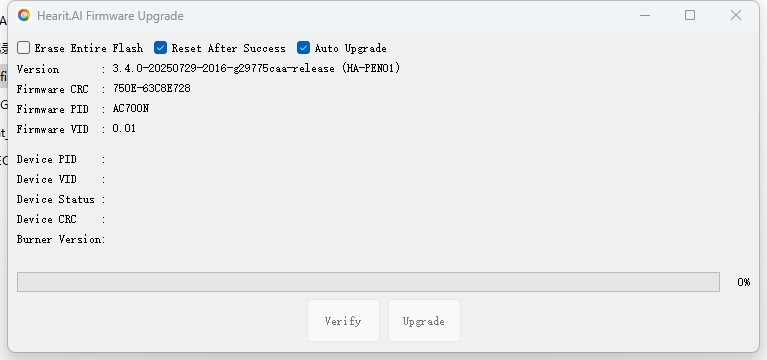
- Wait for the program to load completely (the main program interface usually appears)
Step 3: Connect the Device
- Ensure the USB connection is secure between your computer and the device
- The flashing program should automatically detect the device
- Confirm the connection status displayed on the program interface

Step 4: Automatic Flashing Process
- The flashing program will automatically begin the firmware update
- The program interface will display the connection status and flashing progress
- Wait for the flashing to complete; do not perform any operations during this period

Step 5: Manually Trigger Flashing (If Automatic Flashing Does Not Start)
- If the program does not start flashing automatically, check whether the device entered update mode correctly (LED off)
- Find and click the "Update Mode" or "Start Flashing" button in the flashing program interface
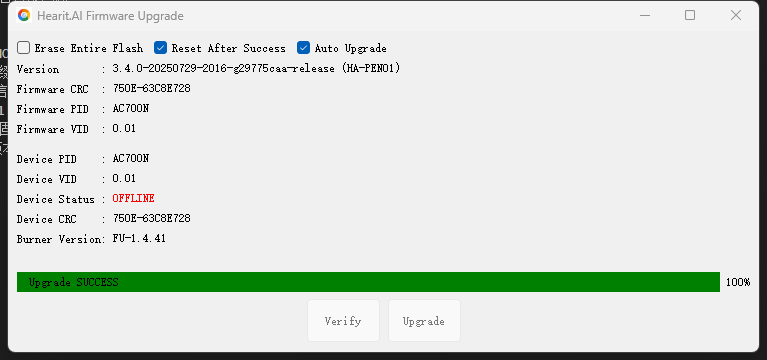
- Observe the progress bar displayed on the program interface and wait for the flashing to complete
Completion and Verification
- After successful flashing, the program will display a prompt message such as "Flashing Completed" or "Success"
- The device will automatically restart after the update
- Disconnect the USB connection and check if the device can start normally
- Blue LED will indicate the device is powered on
- If the device starts normally, the flashing is successful
- Your device is now ready to use with the latest firmware
Troubleshooting
If your firmware update fails:
- Ensure the device has sufficient battery (>50%)
- Try a different USB cable or USB port
- Restart your computer and try again
- Contact support for assistance
Important Notes
⚠️ Before Updating:
- Ensure the device is adequately charged (>30% battery recommended)
- Use a stable WiFi connection with internet access
- Do not interrupt the update process
⚠️ During Update:
- Do not power off the device
- Do not press any buttons
- Keep the device stationary
- Maintain WiFi connection
⚠️ After Update:
- Allow the device to complete the restart process
- Test basic functions to ensure update was successful
- If you experience issues, try a factory reset (contact support for instructions)
Need Help?
If you encounter issues during the firmware update process:
- Support Email: [email protected]
- Online Help Center: https://support.hearit.ai
- Technical Documentation: https://docs.hearit.ai
- Device User Guide: HA-TOY01 User Manual
For the latest firmware updates and features, always refer to the official Hearit.AI support channels.